Trustee Directory Manager
You can access the Trustee Directory Manager from the following places:
- The Trustee Directory node of the Administration Console.
- The Trustee Directory component of the Configuration Manager.
- The Manage button in the Trustee Directory Configuration dialog box.
- The Lookup Options property box for the Find User, Find Group, and Find Manager activities. In the Search In drop-down menu, select Manage Directories.
- The Group tab of the Route to Group activity and the User tab of the Route to User activity. Click Manage.
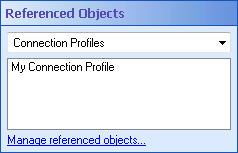
- If you have already configured one or more trustee directories with a Route Entry to Group, Route Entry to User, Find User, Find Group, or Find Manager activity, you can configure trustee directories from the workflow's Referenced Objects property box. (To view and edit this
 property box, select a blank area in the Designer Pane and click the Advanced button
  at the top of the Properties Pane.) Select Trustee Directories from the drop-down menu, and click Manage referenced properties. In the Referenced Object Manager, click Manage.
The Trustee Directory Manager lets you configure LDAP trustee directories (such as Active Directory) and Laserfiche trustee directories.
Tip: Add an entry for your Active Directory host to the LDAP tab if you want to interact with Microsoft Windows domain accounts.
To configure an LDAP trustee directory
- In the Trustee Directory Manager dialog box, select the LDAP tab. The tab will list all the LDAP trustee directories available to Workflow.
- Click Add.
- In the Configure LDAP Trustee Directory dialog box, under Profile Name, type a name for the trustee directory you are about to configure. Users will see this name in the Trustee Provider list in the Workflow Designer.
- Under Host, type the domain where the trustees are located. By default, Workflow will connect over the standard LDAP port of 389. To have Workflow use an alternative port, append ":portNumber" to the Host value. To use LDAPS (encrypted LDAP), specify port 636 (standard LDAPS port), e.g., "example.com:636".
- Under Distinguished Name, type the distinguished name you want to use with your Server profile. The base distinguished name defines the set of accounts that can be added to the repository and must be input in the correct LDAP distinguished name format. By providing these names, you are telling Workflow which part of the directory it should interact with. For example, CN=Sales, CN=Group, DC=Laserfiche, DC=com. If you are using Active Directory, you do not need to define a distinguished name.
- Under Directory Service Provider, select whether you are using Active Directory or eDirectory.
- Under Authentication, specify an LDAP account with sufficient privileges to contact your LDAP server. This account will be used to connect to LDAP whenever the Laserfiche Server needs to check a user's credentials.
- Click Test to test your configuration.
- When finished, click OK. The new trustee directory will be displayed in the Trustee Directory Manager under the LDAP tab.

Note: eDirectory is the most common choice for LDAP accounts and is used with Novell accounts. Active Directory is typically used with Windows accounts.
Note: You can modify or remove an LDAP trustee directory by selecting it in the Trustee Directory Manager dialog box and clicking Edit or Remove.
To configure a Laserfiche repository as a trustee directory
- In the Trustee Directory Manager dialog box, select the Laserfiche tab. The tab will list all the Laserfiche trustee directories available to Workflow.
- Click Add.
- A list of the repositories you configured to be monitored will be displayed. Show me what this looks like.
- Select the monitored repository that has the trustee directory you want to add.
- Next to Name, type a unique name for the trustee directory.
- Click OK.
Note: When you configure a monitored repository in the Workflow Configuration Manager or the Repositories node of the Workflow Administration Console, the Laserfiche trustee directory for that repository will be automatically added to this list.

Note: You can remove a trustee directory by selecting it in the Trustee Directory Manager dialog box and clicking Remove.